How to Setup and Tune Standup Yamaha Superjet Mikuni Jetski Carbs
Curious as to how you tune and set up your Standup Yamaha Superjet personal watercraft? Today we're going to talk about Mukuni carburetors, carb settings, and how to tune your superjet with aftermarket upgrades to help your jetski perform at its highest power. We will be using the Dual carb 38 Mikuni on the Yamaha Superjet for this video and blog.
In 2006, the EPA came out with a new rule eliminating the T handles on the carbs of the jetskis. Instead manufacturers put brass plugs in there, which can make it difficult for tuning the superjet pwc. We are going to go over how to remove those plugs, how to remove the choke plates to let a little more airflow, and how to put aftermarket air filters and stacks on your carbs and set them up so they run properly and your jet ski starts properly. We also offer a rebuild kit if you want to start fresh. And it’s always good to start with a fresh set of spark plugs. Carburetor tuning and carburetor rebuild are something that TC Freeride specializes in. We also offer oem kawasaki Jetski and Oem Yamaha Waverunner parts and gaskets. Subscribers to our YouTube channel will receive helpful tips on carb tuning and proper pwc setups.
How to tune your jetski:
Tools required for tuners:
- Hammer
- Crescent wrench
- Set of Dikes
- 12 mm socket
- 10 mm socket
- Set of easy outs
- Drill
- Metal File or Die Grinder
- Vice with rubber jaws
- Flathead screwdriver
Steps to follow:
Step 1
Remove Mikuni carburetors and flame arrestor from the jet ski intake manifold.
Step 2:
Separate the carbs by pulling the fuel system line and removing the screws on the choke plate. Note you will be discarding the screws and plastic caps that you remove from the choke plate.
Step 3:
On the remaining screws in the Mikuni carburetor shaft, file down any screws that are sticking up. They will need to be flush with the shaft in order to be pulled through the carburetor. You can use either a die grinder or a metal file.
NOTE: Don’t worry if you get dust into the brain of the carburetor, we will be going over how to clean carbs, low speed jet, and high speed jets and flush them out as well.

Step 4:
Once the choke plates are out, place the Mikuni carb in the vice with rubber jaws. Make sure to handle the carburetor gently as it is fragile. Once the carburetor is securely placed in the vice, drill a hole in the brass fitting to remove the brass plug. Next, take an easy out, place it in the hole that the brass plug was removed from, and set it with the hammer. Use the crescent wrench to turn the easy out counterclockwise. Use light pressure until you feel it break free. Lift the wrench as you turn until it comes out. Next, flip the carburetor over carefully, put it back in the vice, and turn and lift. Repeat this process with all four plugs.
Step 5:
Now that all of the drilling and grinding is complete, the next step is cleaning the carburetor. Using carb cleaner, spray out the throat and plug holes of the carburetor. Use compressed air to spray all of the cleaner out.
Step 6:
Take a flathead screwdriver to remove the stock adjustment screws, turning counterclockwise. Place the jet down, and remove the spring, washer, and o-ring from the screw. Save these two pieces because they will be going back on the t-handle.

Step 7:
Before installing the new jet, take some contact cleaner on a QTIP and clean out the inside of the carburetor where the screws were just removed to ensure there's no debris or shavings inside.
NOTE: Threads on the new adjustment mixture screws are coarse on the high speed adjuster screw and fine on the low speed. Please pay close attention to make sure you don’t mix these two up.
Step 8:
First, take one of the high speed T handles and place the spring, washer, and o-ring back on. Screw back into carburetor until it bottoms out, and then open it up one turn. On the other side, take one of the low speed T handles, following the same process as the high speed t handle. Once it bottoms out, open one turn and a quarter. It is important to add the quarter turn on the low speed t handle.
This setup will work with a bone stock ski Yamaha 701 with no modifications. It also will work on a B-pipe setup. It will help the jet ski start up easier and let the carburetor breathe properly. Whether you're riding full speed on the track and you're lifting on the throttle, it will work properly with this modification.
Changing the High Speed Jets
Next, we are going to go over how to change the high speed jets from a 130 to a 135, as well as change the pop off pressure by adding 80 grams springs. Carburetors come stock with 1.5 needle inseams and 115 springs, which give a very high pop off pressure. By lowering the pop off pressure to 80 springs, the jetski will start better and carburete properly. Keep cleanliness in mind while you are working on the carburetors. Main thing when you're working on carburetors is cleanliness. Wipe your tools with a towel after each use to try to keep things as clean as possible.
Step 1:
Use a screwdriver to remove the cover by taking out the four screws on the carburetor. If you are unsure as to which side or what screws, please refer to our Youtube video linked on this page.
Step 2:
Remove the plate by taking out the two screws. Loosen up the arm screw for the needle and seat (we will be changing the spring).
NOTE: The screws are usually very tight from the factory. Be careful not to strip these. You can use an impact screwdriver that you hit with a hammer to loosen these up if needed.

Step 3:
Carefully remove the arm and little pin. Remove the spring and discard. Turn the carburetor over and knock on it gently to get the plate out.
Step 4:
Next we are going to be replacing the jets. Leave the pilot jet in place, we will only be replacing the main jet from a 130 to a 135. Take a flathead screwdriver to remove the main jet. Place the new jet in the carburetor.
NOTE: Take a look at the top of the jet if you want to double check you took out the right one, it will have the number on the top.
Step 5:
Reinstall the plate, 80 grams spring and needle back in the arm and pin, ensuring that the little dot goes over the spring. Carefully hold it in place and tighten up the screw until it's nice and snug. Test it to make sure the needle and seat's working properly. Tighten up the plate and clean it.
Step 6:
Reassemble the carburetor. We recommend greasing the screws before you reassemble with a waterproof grease. Use the flat screwdriver to tighten them.
Tuning The Mikuni Dual Carb setup
Now that the carburetors have T-handle screws, it’s time to tune them.
Step 1:
Remove the large spring on the carburetor by removing the linkage. Remove the spring and then reinstall the linkage.
Step 2:
Remove the Halfmoon throttle cable holder. Install the new throttle cable and tighten it with the nut.
Step 3:
Next step is to set the linkage. Because the choke plates have been removed, there are holes in each side of the carburetor. We recommend using plexus to plug these holes.
NOTE: This setup does not need a primer. Some ocean riders do prefer a primer because if they get a little bit of water in their ski, they can prime it and give it extra fuel.
Step 4:
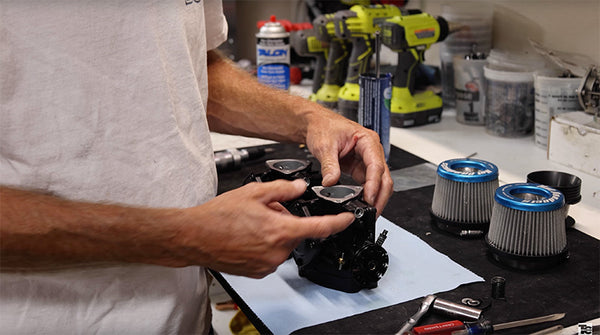
We are going to install the air filter adapters, also called stacks. We recommend stacks as they act like a vortex in helping to pull more air. It's like a vortex and it helps pull more air. Place the stacks on the carburetor and then place the air filters on top of the stacks.
Finishing up
Now that you have finished your jetski setup and tuning, your jetski should breather easier and allow more airflow for maximum performance. If you dont feel comfortable performing this modification, TC Freeride can help! Ship your super bn carburetors over to us and we can complete the modifications for you so your carbs are ready to go back on the ski and out to the water for some fine tuning. If you have any questions, feel free to reach out to us.